Wednesday, September 06, 2006

ATS Berlin: Moabit Mayhem really long AAR

Contrary to appearances, I ain’t been shot, Mum! Extra-blogular events have transpired to add some rather lengthy delays into my publishing ‘schedule’ – you know, stuff like family, job and allergies.

So. What we have here is one mega-butt-kicking after-action report for a game of ATS Berlin: Red Victory. The game took a while to finish – the first three turn were played the first week of August, the last three turns were played the first week of September. But there you have it.

The scenario here is Moabit Mayhem, from Berlin: Red Victory. It uses a medium-sized slice of the game’s massive Berlin map to portray the initial Soviet assault into the Moabit district.

In order to win the game, the Soviets have to capture three of the four objective building complexes on the map – the Prison, the Train Station, the Customs Yard and a location just west of the Train Station that I’ll refer to as the Office Building.

The German setup was intended to lightly defend two of the locations – the Prison and the Office Building – and focus the main effort on defense of the Customs Yard and the Train Station. In addition to their on-map troops the Germans will receive 5 squads of heavily-armed parachute infantry on Turn 3. They also benefit from an SSR that subjects Soviet units moving near the river to possible sniper fire.


Turn 1

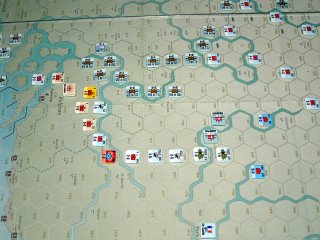
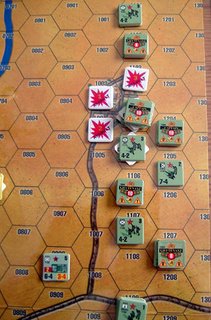
On Turn 1, my Soviets swarm onto the map, mostly with balls-to-the-walls movement (as evidenced by all of the ‘Winded’ markers in the turn 1 photo). As is the case in many scenarios, the attackers don’t have much time to sneak around in this one – so some early rapid movement to get stuck-in quickly is the prime directive.

My Russians attacking the Customs Yard spent the first turn just getting into position for more serious work. I rolled a couple of assault guns up to try and blast the defenders, and one of the heavy howitzers unlimbered where it can engage the German medium machinegun. If the Reds don’t get the initiative on turn 2, the gun crew may well get shot to hell by the MG – but at least they’ll provide a distraction so the rest of the attackers can get to work.


The Soviet troops tasked with taking the Office Building got stuck in to their assault rapidly. In the turn 1 photo, one of the ‘Winded’ stacks has already engaged in melee and eliminated the occupants of the Office Building.


My Russians’ turn 1 was aided by truly, honestly miserable shooting from the Germans (maybe because they’re Volkssturm?). Even with all of the running movement, the Russians took a grand total of 2 steps of casualties. In maybe 10 or so attack dice rolls (with a d10), my opponent rolled less than a ‘7’ exactly twice. Russian rolls were less numerous and no more successful, but since my main job on turn 1 was movement that was no big deal.


Turn 2.

The Germans won the initiative for turn 2, and the machinegun in the Customs Yard mowed down the crew of the howitzer before it had a chance to fire. But the SU-152 blasted the crap out of the machine-gunners and turned the upper floor into smoldering rubble.

Russian infantry, meanwhile, cleaned up the lurking Volkssturm tank-killer squad and also took out the crew of the infantry gun. My Soviet grunts took some casualties assaulting the tank-killers, but they did their job.


There’s another German machinegun upstairs in the Train Station that can fire to cover the flank of the Customs Yard. One of my goals for turn 3 is to neutralize that gun. The two 203mm howitzers can both draw a bead on it, as can the SU-152. If the Germans win turn 3 initiative, I think maybe the machinegun guys should run and hide somewhere.

In the center, I consolidated my hold on the Office Building and began firefighting with the Germans in the Train Station. I didn't want to put too much of my infantry in harm's way because the Germans will get their reinforcement platoons on turn 3 and I wanted to see where those guys go first.

In the north, the Germans simply tried to draw things out. The Volkssturm guys up there managed to infiltrate away from the my assault squads and avoid melee – but they had to retreat into an exposed cellblock location of the prison in order to do it. They will likely get shot to bits in turn 3. They’re going to lose the prison, of course, but it’s more a question of how long they can hold out and how many of my squads they draw into the fight and away from other locations.


Turn 3

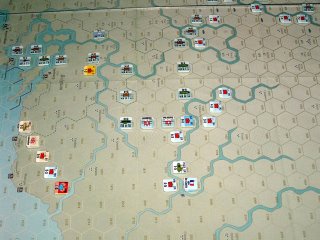
Sometimes it’s a bad day to be in Berlin, as the 3_End photo probably demonstrates. What my honorable German opponent thought would be a steely defense of the Customs Yard pretty much crumbled in the space of a single turn.

His German paras holding the Yard had largely been hunkered down, holding off to cover the approaches to the complex with opportunity fire. I suspected that the Germans doing anything down there but holding their fire in anticipation of a Soviet assault would be a mistake. And I was right.

It was one of those ‘slippery slope’ chain-reaction things. All of my Russian tank fire on the Yard defenders was pretty ineffective, although I did manage to get BOT on a couple of positions that would improve my chances on turn 4. I was thinking about being patient for a couple of turns to let the big guns do their thing, but then I realized I had a Red assault platoon (three squads and a leader) in the orchard south of the Office Building that could actually move under the bridge and into the building below the rubble of the former machinegun nest without taking any opportunity fire until they were under cover of the masonry building.

So that’s what I did. Of course, the German para squad they moved adjacent to fired at them – but a single squad (even of paras) doesn’t really have enough firepower to score much of a result against steely Slavic grunts under masonry cover (even with the shift reduced by assault movement). My guys took only a single step loss and were then in a position for a melee assault.

Plus, that expended about a third of the available opportunity fire that was covering the front of the Yard. A para squad has a good chance of shooting up attackers approaching across open ground – but coming at them through the buildings on their flank was bad news for them.


I pushed up a medium machinegun on the far left of the map, and that’s when the Germans experienced a ‘command failure’. One of the other German para squads shot at it. They inflicted a C1 result and the crew then flunked their morale check and broke – but that expended another potential defensive fire. That left one German squad able to cover the front, but I had two assault groups in position. So I sent them in. The first group of two rifle squads and a leader got shot up pretty good on the way in when the Germans rolled up a jolly C4 result. That flipped both squads. The leader and one squad broke, but the Germans were then out of opportunity fire. Three Russian submachinegun squads (those lovely 8-2-8 guys) then charged in with a leader. They didn’t even have to get into a melee; their assault fire wiped out the German squad they were going to attack. In the 3_End photo you see the results of the German debacle: A second squad wiped out in melee and the surviving para squad withdrawing to a spot where the Russian tank guns can’t shoot at it. Bad day to be a German paratrooper indeed.


Endgame – turns 4, 5 and 6

After about a two week layoff, we finally got in a session to wrap up the scenario.

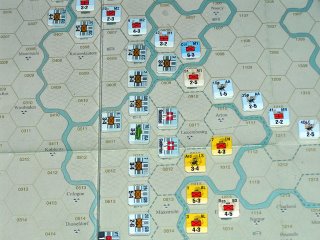
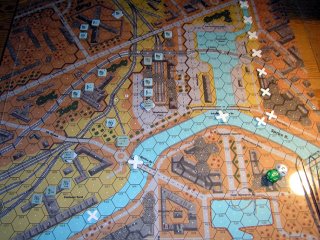
The accompanying digisnaps show the main positions after turns 4, 5 and 6. The Germans didn’t have enough of a toe-hold anywhere to give any help to their five counter-attacking squads of parachute troops. So the paras had to make their way into the Train Station and then figure out what to do. In order to prevent a Russian win, they have to contest occupation of at least two of the four major building complexes in the play area – the Customs Yard, the Prison, the Office Building and the Train Station.

The snappies tell the story in a nutshell. On turn 4, the paras moved into the Train Station as the remnants of a defending Volkssturm platoon fled from the approaching Russians. The lone squad of Reds in the Train Station had just used infiltration to engage and eliminate two broken VS squads.


On turn 5, the German paras managed to eliminate the over-enthusiastic Russian squad and then moved into a jumping off position for their final, bold attempt to contest a second building. Chances for a successful counter-attack were pretty slim – because with most of the rest of the German force eliminated the paras would have to leave enough behind to hold the Train Station.

As you can see in the End_5 snappie, my Russians pretty much had the Train Station ringed with infantry, assault guns and heavy weapons. Pretty desperate looking, although my flank near the prison appeared weak enough that we thought it might be fun to give it a try.


The End_6 snappie shows where we called it. The para platoon remaining in the Train Station delivered some punishment to the Reds in the Office Building, but got whacked by a blast from one of my SU-152s (thus the BOT marker on them). The second para platoon used smoke to cover the first part of their movement out of the Station, and moved to attempt a point-blank PanzerFaust shot on the SU-76. Their shot just missed, and they got blasted for their trouble.


So. With the most of the paras remaining in the Train Station sitting under a BOT from a 152 mm assault gun and the second para platoon fairly shredded and still outside of the prison, we decided to put the wraps on this one.
Monday, July 24, 2006

Nothing quite like a trip to the desert

My apologies for the slight interruption in this blog’s progress in detailing the fall of Berlin at the squad level. But everybody needs a vacation every once in a while – so we’re back and typing after a week-long visit to Arizona.

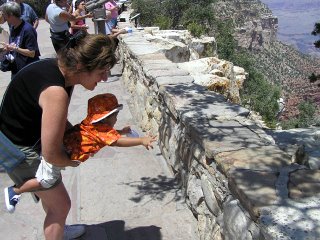
Of course, no trip to Arizona is complete without a visit to the Grand Canyon. So we trooped from Sedona up to the South Rim for a day and let Juanco chase after all of the wildlife he could spot. Here is a typical vacation moment as Junior Destructo Man tries to capture a squirrel.


Everything with four legs was fair game. He called them all “kit-kat”, since that’s what he calls the four-legged critter at home. The only one he actually managed to get his hands on, fortunately, was a rather well-behaved furry mop of a little dog. Both boy and dog survived the close encounter without a bruise or scratch.

The adventure included a Friday night trip to Chase Field, where we watched the Diamondbacks beat the Rockies. Nice ballpark, although I can do without the 118 degree summer heat in Phoenix. Needless to say, they didn’t turn off the air conditioning and roll back the stadium roof that night. It was still 100 outside when we walked back to the hotel (three blocks away) around 9:30. Any way you slice it, that’s just too damned hot.

Thursday, July 13, 2006

ATS Berlin: Time out for a holiday

The battle for Berlin is underway on The Big Table – but there’s going to be a slight delay in the proceedings. The driving force behind the game – that being me – will be off on vacation for the next ten days.

Being a typical game geek, I’m planning to lug along at least one set of game rules for some light reading while I’m gone. I might even put into action my plan to take along a rules set for one of the Command at Sea games with the notion of actually playing a small game by plotting ship positions on a piece of graph paper. That’s pretty ambitious, though, so no promises there.

Last time I took a ‘real’ vacation and carried along a serious set of game rules, the whole project turned out pretty messy. I spent one morning at our condo in Princeville sitting out on the porch reading through the “Dirtside II” minis rules. I left them sitting on the table out there in the afternoon when we took off to play some golf and – as luck would have it – a windblown rainstorm swept down from Mt. Waialeale that afternoon and drenched everything. The drenching included our roofed-in back porch, so the rules got a solid soaking. I was able to eventually salvage everything into readable condition, but it wasn’t a happy sight.

I no longer leave valuable printed material sitting out. Yeah, yeah, we’re off to Sedona and it seldom comes a drenching there – but I know leaving something out where it could get wet would be the ultimate wargaming raindance.

This will be our first trip (since the trip back from Guatemala last November) with Junior Destructo Man. At nearly 16 months now, he’s quite a bit more mobile. So it will be, um, interesting to see how he takes to nearly 5 hours of air travel.

Wednesday, July 05, 2006

ATS Berlin: A look at Scenario 1

Strange Defeat has gone up on the shelf for now. Next on the table: Scenario 1 “Moabit Mayhem” from ATS Berlin: Red Vengeance. I’ve poked around at a couple of the Berlin scenarios in the past, but this time I’m keeping score.

A digisnap from the pre-game appears below. It’s the German setup for the scenario before flipping the weapons to the their FOW sides and applying any Full Cover markers. The Germans also get some reinforcements in the form of a parachute infantry platoon on turn three. The big white tile spacers on the map mark the scenario boundaries.


The Soviets mob onto the map from the west. In eight turns, they have to control three of the four buildings where the Germans are setup in order to win the game. They’ve got a horde of infantry, some assault guns and a couple of pieces of direct-firing artillery to work with.

Even for experienced ATS hands, the Berlin scenarios present some very special challenges. The urban landforms are more peculiar than those found in the various Stalingrad scenarios, for example, which means a thorough reading of the battlefield walkaround in the scenario book is extremely important. In scenario 1, there’s also an SSR that subjects any Russian unit within four hexes of the Spree to possible sniper fire (depending on LOS conditions).

The Germans here have chosen to contest a couple of the buildings with only Volksturm squads, which are generally pretty iffy in their performance. Defense of the warehouse along the river has been given to a parachute platoon, supported by a MMG. Defense of the railway station has also been leavened with some paras.

The basic idea is for the Volksturm defenders of the prison and what I’ll call the “office building” (J12) to delay the Soviets and inflict as many casualties as possible. The Germans need to hold or contest two of the four buildings by game’s end, and the two buildings where they’ll make their stand are the rail station and the customs yard.

If the Volksturm guys do their jobs, they should absorb enough of the initial assault to give the German reinforcements time to get into position. The para platoon that arrives on turn 3 can enter anywhere on the east edge, so they have some flexibility on where they’ll commit. They can reinforce the rail station easiest, so that’s a likely course of action. If the Reds quickly clear the prison but then get sloppy, the paras can counter-attack to take or contest that location. They might even be able to reinforce the customs yard, but that might prove tricky depending on how the Soviets can cover the approaches with opportunity fire.

Although the Germans have no tanks in this scenario, the Russian tanks just can’t go charging around the map. Two Volksturm tank-killer teams lurk on the map, and the German OOB also includes two panzerschrecks and six panzerfaust single-shot weapons.

The Red Army of Workers and Peasants have their work cut out for them.

Monday, July 03, 2006

Strange Defeat: One more try

A final look, for now, at Avalanche’s Strange Defeat, this time sans le chat. Managed to get in two games over the weekend.

The Germans won both games. I suspect in both cases that the Allies were over-aggressive, but finding a successful strategy for them is difficult.

In the first game, the Allies adopted a more spread-out approach. Their defenses deployed fairly dispersed, mostly one unit per hex with a few of the “AA” deployment group added for stiffening where allowed.

The dispersed deployment keeps the German armor from trying to ‘ooze’ the French defense, but it I think it opens up the Allies to defeat in detail. My thoughts on it are that the best chance the Allies have of inflicting step losses is when they’re defending. A good German player will always have an armor unit of some type stacked with his spearheads to gain the ‘Allies attack at half strength against armor stacks’ advantage – which means French counter-attacks frequently just bounce off.

Also, the bucket o’dice combat system punishes small stacks by making them easy to overwhelm. A German attack that scores three ‘hits’ will eliminate a single unit (two step) stack, but the same attack can be absorbed with a single step loss and a two-hex retreat by a larger stack.

At any rate, the dispersed defense seemed only to delay things. The Germans sort of stupidly pressed a frontal attack against the Belgians along the Dyle, which cost them some unnecessary infantry casualties. The Germans ended up bagging them eventually, but suffered from a few French/British counter-attacks in the process. Most of the BEF evacuated via Operation Dynamo, although once again the courageous French Gen. Piroux and his boys got whacked in the process.

Axis forces coming out of the Ardennes chopped up the dispersed defense facing them with a series of armor-led blasts that drove to Chalons by turn four. The Germans opted to not attack any of the Maginot forts, reckoning that picking up three or four additional Political Points wasn’t really worth running the risk of facing the defender advantage (hit on 5 or 6) of the forts.

On turn 5 the BEF evacuated via Dynamo and the French were down to a hand full of units defending in front of Paris. The PP index stood at -23 with little prospect of improvement for the French, which pretty much ended things.

In the second game, the French opted for a slightly different defense approach. Where possible they stacked defending units in groups of four or five steps. This left a few hexes uncovered except by ZOC, but it also forced the Germans to attack into stacks that would be rolling 9-12 dice against their panzer spearheads.

It worked for a little bit, I think. The Germans decided to take out the northern-most of the Maginot fortifications, which the Allies had stacked with 6 steps of defenders (two French fortress units and the BEF 51st Division). Both sides rolled a bunch of hits. One German infantry corps was wiped out and two more reduced – but the Germans rolled seven hits with some like 24 dice and wiped out all three units in one go. That was something like an 8 PP swing right there. Argh.

The Germans were loathe to commit panzer/motorized units to attacks against the bigger stacks without infantry support, and the jockeying around left them open to a couple of counter-attacks. The Allies managed to set up one good counter-attack in Belgium, which fizzled when they rolled 14 dice and got only 1 hit.

The turning point, I think, was a large French counterattack just west of Sedan. The Germans had driven Guderian and two panzer corps forward without infantry support, and the French managed to put them out of supply. But that attack failed even more miserably. They rolled no hits on 18 friggin’ dice, while the defending Germans rolled two hits with 6 dice. Had that attack succeeded, I think the Allies would have had a chance at winning the game. But, c’est la guerre. The counter-attacking British in Belgium then got chopped to bits and Ie called the game after turn 5 with the PP index standing at -26 and set to plunge even lower.

I think that will wrap up my investigation of Strange Defeat for now. More games beg for table space. Details shortly.

Tuesday, June 27, 2006

Strange Defeat: Catastrophe strikes!

Yes, indeed. Monday – sometime Monday – a literal cat-tastrophe struck the invasion of France.

Normally, Sam the Cat doesn't venture into my office where the big game table is set up. During the day, when I'm not home, the office door is closed - both to keep Sam out and, lately, to keep my 15-month-old Juan Carlos from diving under my desk and switching off all of the little glowing buttons.

At some point today, though, Juanco opened the door and ran cackling for my desk. Grandma intercepted him - but apparently left the door open long enough for Sam to find his way in and curl up in a corner to sleep for a while unmolested by Juanco the Giggling Cat-Chaser. When Grandma later closed the door, Sam found himself trapped.


When I got home and opened the office to put away my brief case, Sam was sitting - quite defiant and rather pissed off - in the middle of France with half of the Allied Army knocked into the English channel and half of the German army swept onto an adjacent map for ATS: Berlin. So ended the campaign for France.

A do-over will shortly be underway – although I suppose it won’t get quite the same detail of blow-by-blow narrative. I will, however, update with more observations and general impressions.

Strange Defeat: The invasion presses forward

Turn two opened with the fall of Defiant Holland as the Germans overwhelmed the defenders of Amsterdam – with German motorized forces roaming the rest of the country at will the Netherlands would surrender at the start of Allied turn 2.

Farther south, German forces expanded their crossing of the Dyle and fought their way through additional Belgian fortifications. Strong counter-attacks by the BEF inflicted some casualties, but by the end of the turn only a lone step of Belgian forces remained on the map.


Panzer forces rolling out of the Ardennes continued driving toward Paris, overrunning Chalons in the process. Additionally, the fall of the northern-most Maginot fortifications would allow the Germans to push forward more of their infantry to support the spearheads.


Turn three went pretty badly for the Allies. The Germans used their greater mobility to re-direct their strongest panzer forces against the weak Allied ‘center’ – wiping out three French corps in the process. A clever little operation along the coast near Antwerp nailed a fourth French corps and the BEF reserve corps, and threatened to turn the northern anchor of the Allied line. They also launched a couple of attacks against the thinned Maginot defenses, causing the Allies to think perhaps they had combed out too many of the line’s better formations.

A French counter-attack mounted with three corps near Chalons met with some limited success, trading an infantry step loss for the reduction of the Germans’ strongest unit, the 19th Panzer Corps. Most of the German panzer units on the map are now operating at reduced strength – but the Allies have been so pummelled at this point that it may not matter.


In addition to the counter-attack, the French began trying to form up a defense of the capital in an attempt to stave off the Germans for a turn or two and gain some political points. In the north, the BEF operated in retrograde somewhat pell-mell to form a new line anchored on Ostend along with several French units. Their objective at this point is to divert Germans from the main thrust and to try to maintain a position that will allow for a rapid evacuation via Operation Dyanamo when the time comes.

Friday, June 23, 2006

Strange Defeat: The invasion begins

The German attack opened on turn 1 with a strong armored thrust out of the Ardennes, a large German drive into Belgium and a smaller operation launched into the Netherlands.

The Dutch gave the invaders a bit of a bloody nose. German paratroops dropped on the lone Dutch fortress unit in Amsterdam, but their attack in conjunction with three additional units was a complete shambles that resulted in the elimination of the paras and no losses inflicted on the Dutch.

But that was pretty much it for the Allied highlight reel. The second parachute regiment dropped as part of the assault against the fortress of Liege and was considerably more successful. The Belgians took very heavy losses getting driven back from the Dyle, although by the end of the German turn they still held both Eban Emael and Namur. Only 5 SP of Belgian troops remained on the map, however. The German advance into Belgium cost them losses amounting to two steps of infantry and one step of motorized infantry.

The German panzer spearheads exploded from the Ardennes and hammered the French defenders. The assault on the northern-most of the Maginot forts met painful repulse, but the panzer forces skirted that battle and quickly drove back or elimnated the French defenders of Sedan and Mezieres. By the end of the turn four French units had been destroyed and a large gap blown in their defenses. German losses were very light, totalling just one step from the 5th Panzer Division. The first photo here shows the situation at the end of the German turn.


The Allies, faced with some severe movement restrictions on Turn 1, did what they could to slow the Germans and inflict some casualties. British and French forces moved forward to counter-attack in Belgium, and they also made use of some strategic movement opportunities to mount an operation against Guderian's spearhead at Mezieres. They also managed to score a minor success with the evacuation die roll for Queen Wilhelminia, gaining them one very happy Political Point.

The Dutch were forced to attack the superior German forces outside of Amsterdam (combat is mandatory unless the phasing units are in a fortress hex), but the Germans muffed their 9 defensive dice and neither side inflicted a casualty.

The first attempt at a joint British/French attack, against the German forward-most troops just north of Eban Emael, fizzled amid bickering and British fumbling. Alexander, the Royal Armored Corps and British 1 Corps evidently had bad maps, which left General Piroux and his DLM alone in a valiant assault that managed to inflict a step loss on 16 Panzer Corps. It was, however, a death ride for the French armor, as the DLM was destroyed and Piroux killed in the process.

French and British commanders farther to the south proved more cooperative. One of the French corps in the "MR" deployment group passed its movement check and moved against the Germans at Mezieres, providing some operational cover as British 3 Corps used strategic movement to join the assault. The coordination roll succeeded, and 3 French and the British corps slammed into Guderian's troops. Both sides suffered two hits, and both elected to take their second step loss as a retreat. The Allies lost one French infantry step in the attack, while the Germans lost a step from 10th Panzer Division.

The turn ended with the Allies able to form some sort of a line in front of the Germans, although the situation in the south is tenuous at best. The political point index stands at -7. The second photo shows the situation at the end of the first turn.

A new game on the table

Today I turn the gaming eye of this blog onto the subject of one of the latest games published by Avalanche Press, Strange Defeat: The Fall of France 1940.

Times being what they are (lacking time, that is), it’s only take me a week or so since it landed on my doorstep to get this one all ready to go. Which probably leads the casual observer (people without 15-month-olds running around the house switching all of the electronics off and on) to believe I’m some kind of a moron.

Physically, it’s not a large game. It’s packaged in one of APL’s small format boxes and retails for $20. 140 counters, small format rule book. The map, however, is more or less full-sized – and I’m going to address the subject of the map first because it’s my only real gripe with the game.

I say “more or less” full-sized because maybe a quarter of the map sheet is essentially waste area on the left-hand side. There’s a big honking title for the game – just in case you forget what you’re playing – and all of the game tracks are very small indeed. The terrain effects chart is not printed on the map. Perhaps it was supposed to be. In fact, the TEC is only available as a download from the APL web site.

The appreciation of map art, of course, is very subjective. Some folks like the Strange Defeat map, others don’t mind it. It’s not what I’d call a ‘bad’ map by any stretch. But it somewhat “underwhelming”, for lack of a better term.

It uses some of the same iconography found in the early games of the series – Defiant Russia and Red Vengeance. Small ‘sky scraper’ icons for major cities and a trio of ‘teepees’ for minor cities. Functional, but not much to crow about. Typography on the map looks rather small to me. There are no river names. The overall Michael Graves-ish blue and sepia pastel color scheme matches well with the box art, but gives the whole thing a bit too much distance and lacks impact.

From a function standpoint, my biggest gripe is with the very light cross-hatching used on the map to represent rough terrain, including the Ardennes. It is very light indeed and quite difficult for older eyes to discern – blue cross-hatching on a slightly lighter blue background. I also question how much of the huge expanse of map that lies west of Paris will come into play, although in fairness I have not yet played a complete and don’t have a feel for the campaign possibilities.

Counter artwork is up to the usual APL good standard, although they are nothing spectacular. This is due, in part, to the map color scheme. Blue-gray German units and French blue.. well, French … units lose their impact to a degree because of the blue map theme. Otherwise, they are quite readable and well done.

The hex-grid numbering, according to APL, was ‘flipped in production’. As a result, they have provided a new setup card as a download on their website. The setup listed in the rulebook, as a result of the ‘flip’, is completely useless. Oh, and one quick mention of the overall map orientation: The map’s ‘top’ is south in this game. North is at the bottom.

Setup takes a bit longer than you would think for such a small game. It probably gets quicker with experience. Units are each tagged with a setup code, and each setup code has an allowable range of hexes for deployment as listed on the setup card.

Here’s a digisnap of the deployments around the Ardennes used for my first game.


The Germans have basically three setup groups: One covering the Westwall defenses, one comprising the forces attacking out of the Ardennes and a third comprising the attackers from the Ardennes north.

Allied setup groups are more complicated. There are four smaller groups covering the Maginot Line. Another group screens France from the Maginot to the Belgian border. Netherlands and Belgian forces have their own deployment zones. The British, save for one unit, all deploy in or adjacent to Liege. And the French have a further general reserve that deploys within 4 hexes of Paris. A couple of other small deployment groups finish things out.

Next time: The first turn.

Friday, May 05, 2006

My kid will get me for this some day

Unless you’re the parent of a little boy, one of the things you probably don't know about small children is that little boys spend a lot of time playing with their dicks. Juanco 'discovered' his dingdong about three weeks ago and has been doing his baseball player impersonation ever since. Pull his diaper off for a change and he grabs his dick. Put him in the tub for a bath and he grabs his dick. Grandma put him down for a nap last week in a tee-shirt and diaper, and he pulled his diaper loose, threw it out of the crib and grabbed his dick. He also shit in the crib, which upset him mightily – so he sat in one corner of the crib screaming and holding his dick. (It also upset grandma, who has now learned that little Juan Carlos must always wear either a onesie or pants when he's left alone.) Sometimes, even in a onesie, he grabs his crotch just to make sure his dick is still attached.

Mom, of course, being a girl and all, was concerned about all of the dick-grabbing. Sometimes it's a bit of hassle, especially when he grabs for the groin when he's getting changed out of a poopy diaper. Hands in poop, not good. Anyway, the pediatrician informed her that dick-grabbing is perfectly normal at that age. I told her she better get used to it, especially is she wants him to be a shortstop.

Sunday night, Juanco took a bath in the big tub with Daddy. After all of the scrub-scrub-scrub was done, he uncharacteristically relaxed, sat back and, of course, grabbed his dick. With both hands. Since I'm a firm believer in "if you can't stop it, tax it", I sat back and grabbed my dick too. After about a minute of uncharacteristic bath-time complete silence Mom, in the next room, walked to the door to see what was amiss.

"What are you two doing?" she asked. "Just chillin' out?"

"Yep," I replied. "We're just sittin' here holdin' our dicks."

A real father-son moment.

Wednesday, April 12, 2006

A serious escalation

And sometimes, a photo is worth more than a thousand words.

Our remaining cat, Sam, is over 20 years old. Eartha passed a couple of years ago at around 13 years of age, and Friend went to kitty heaven last year at age 18. So we're down to Sam.

I fear for Sam's longevity. The one year old Baby of Mass Destruction has pestered ol' Sam plenty since his arrival, although the cat has seemed to tolerate things with good humor enough. But now things are escalating.

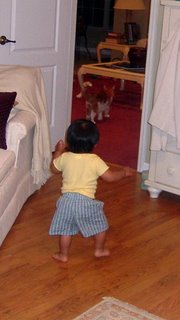
A couple of days ago, after spending months crawling around the house at extremely high speed, the BMD just stood up and started walking around. It wasn't a big surprise because he'd been 'cruising' with a lot of coordination for several months and had also been standing with a lot of stability for nearly the same amount of time. But since he was such an outstanding crawler, I suppose he just never felt the need to go it on two feet.

Until now. Now he's the Walkling Around Baby of Mass Destruction. And, as you can see in the photo below, he already has a primary target in mnd for his walking attentions.

Poor Sammy.

Thursday, April 06, 2006

I, Slacker

Holy crap. I looked back at yesterday’s post and just realized I hadn’t written squat during the entire month of March. What a slacker.

Time flies when you’ve got a Baby of Mass Destruction in the middle of everything. March was First Birthday time for the BMD. Preparations absorbed a lot of time. Recovery from the whole thing absorbed a lot more. By the time he’s seven or eight, I’m seriously hoping that I’ll be able to sleep past 7 a.m. on weekends again. I miss my sleep-in mornings.

Oh yes. The obligatory baby’s first birthday photo:


After I finish the family income tax ordeal, I should have some time to get caught up on the gaming front. Last month’s small amount of gaming time was devoted to a couple of Avalanche Press games: Red Vengeance and Defiant Russia. I spent some time converting both of them to Cyberboard gameboxes (for personal use only…) and then played both of them several times.

Of the two, I found Red Vengeance to be more enjoyable. Defiant Russia struck me as more a ‘historically based’ game because there’s really very little about it that’s going to simulate the historical flow of events. No Germans are getting to Minsk by the end of June. A bad turn of luck in the early game can also pretty much short-circuit even the best German plans. Absent really wild swings of luck, I think the game is moderately competitve (with a slight balance tilt toward the Soviets) – it just doesn’t do much in the way of educating you about the actual campaign.

Red Vengeance does a better job all-around, I think. There’s more open maneuver, more opportunities for both sides to do things. Game balance hinges in areas away from the main ‘front’ on the road to Berlin, but I think that just makes the players’ decision-making more interesting. It’s still not entirely instructional as a simulation, but it is more reflective of history than DR. I think it’s quite a little gem of a game and a real ‘player.’

Wednesday, April 05, 2006

Who says we don't teach math?

Wowser, what a bunch of fun! Just finished up the process of getting a Social Security Number for the Baby of Mass Destruction.

For those of you who haven’t yet tried it, I highly recommend you take two or three hours out of your otherwise boring work day and sit around in the lobby/waiting room of your local Social Security Administration office. It’s completely free of charge, and twice as entertaining as most of the movies currently in release.

At our local branch of the long arm of the Gumment, you do the ‘take a number’ routine when you enter and sit around until your number is called. Today’s favorite event transpired when they called ‘29’ (I had ‘51’) and some old codger started for the windows. A very, very large lady lurched dangerously to her feet and shouted at the top of her lungs: “What the f*ck happened to Number Thirty? What the F*CK happened to THIRTY??”

Thursday, February 16, 2006

PanzerGrenadier: Wrapping up Fontana Alba

To put a wrap of sorts on my running game of PanzerGrenadier: East Front Deluxe, I’ll sum things up by pointing out that it’s VERY hard to completely wipe out one side in a scenario.

EFD scenario three, Fontana Alba, is difficult for either side to win. The Romanians have to control the town. The Soviets have to kick all Romanians back across the river. I think balance in this scenario tends toward a draw, with a modest chance of a Soviet win that depends to an extent upon how hard the Romanians press their initial attack.

The Reds begin rolling for their counter-attack beginning with turn 13 – they have to roll a ‘6’ on a single die to receive their reinforcements. Each hour (four turns), the score needed to trigger the reinforcments increases by one. In this game, they roll a ‘5’ on turn 19 and the counterattack sweeps onto the board.

As seen in the photo below, by the time the counter-attack goes in, the Romanians have managed to contest three of the four hexes of Fontana Alba with assaulting units. The Soviet task at this point largely consists of trying to winkle the Romanians out of those assault hexes.


Sweeping away the few Romanian units that remain outside of the town isn’t a terribly difficult task. The stack of two Romanian machinegun platoons close to the river bridge gets pounded to dust by the Soviet off-board artillery (3 x 10-point concentrations) and the three Soviet on-map mortar platoons, before falling victim to a company-sized assault in fairly short order.

The remainder of the game then boils down to the Soviets managing their assaults against the three town hexes while the Romanians can do little more than hunker down and try to hang on by their fingernails.

The northern-most town hex is cleared in a couple of turns, as the two reduced cavalry platoons there lack any stamina at all in the face of a company-sized assault. Romanians in the other two town hexes cling grimly to their positions, but without reinforcements and with no place else to hide, they can only do so much.

It’s a close-run thing, but the Soviets finally manage to clear out the last of the Romanians with one turn remaining in the game. Had the Romanians suffered slightly lighter casualties in their initial attacks on the town – say, two fewer step losses – they likely would have had sufficient strength to hang on in at least one of the assault hexes and force a draw. As it played out, however, the large Soviet counter-attack – aided considerably by good Soviet leadership draws – was simply too much for the Romanians to contend with.

Wednesday, February 15, 2006

When a balloon is the center of the universe

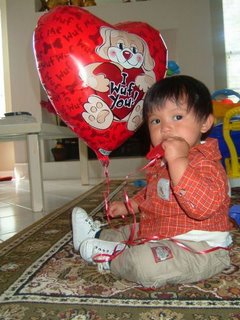
Our child, of course, has no toys. None. He has to play with empty boxes, plastic clothes hangers and spare tubes of Dr. Boudreaux’s Butt Balm to find any happiness at all. (Well, that’s HIS version of events, apparently).

It should comes as no surprise, then, that the helium-filled mylar balloon his Grammy and Pappy gave him for Valentine’s Day was the single greatest event of his young life. He grabbed it, poked it, whacked it, chewed it, drooled on it and generally had a big, whooping time with it. He even slept with it.

If a picture is worth a thousand words, then here you go:


Tuesday, February 07, 2006

PanzerGrenadier: Density reduction

After my “stack ‘em high” post earlier, I wrestled a while with the topic of big stacks in assault hexes. In something less than a fit of brilliance, it suddenly occurred to me that I needed to be using markers for assault hexes and off-map boxes (or cards) to hold the units involved.

Good heavens. I’ve only been playing PanzerGrenadier since the first edition was published years ago. Only now, after years, does the idea pop into my little pea brain. Funny how that works. Perhaps it’s because as I get older I get more fumbly-fingered, so methods of clutter reduction (especially with those hefty 5/8-inch counters) become more important.

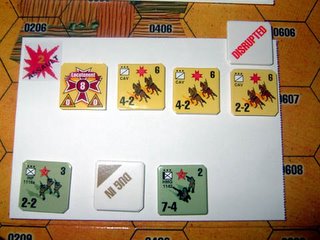
Anyway, here are some photos of the results. Numbered markers for the assault hexes. The units that are in those hexes go onto cards with matching assault stickers.

Doh!


Monday, February 06, 2006

PanzerGrenadier: Those deadly assaults

As I’ve noted before, assault is where a lot of the casualties happen in PanzerGrenadier. Our game of Fontana Alba is no exception. In two playings, the Romanian assault on the town turned out to be the focus of the action (kind of ‘duh’, but there it is).

In the first play-through, the Romanians were somewhat impatient and rushed in for assault without much softening up of the Soviet defense. The result was an outright catastrophe for the attackers. Cavalry gives up a +1 shift to direct fire for starters, which helped get them chopped to ribbons. Charging into a solid defense, they lost four steps to opportunity fire before they were able to engage the first assault.

Since that was such a mess (and kind of stupid, too), that game was written off as an example of how not to execute an assault.

In the second playing, they approached with considerably more patience and beat on the defense with artillery and support weapons (mostly the two machinegun platoons) before closing to assault. As noted in my previous post, this time they were able to get ‘stuck in’ without suffering too much from opportunity fire. For a couple of turns they made a brave run at clearing out the Soviet defenders. But…

Results can snowball pretty quickly in assault. One or two bad morale rolls, or one or two good enemy morale rolls, can cause the situation in an assault hex to get out of control in short order.

The Romanians and Soviets traded assault results for several turns. Superior Romanian morale and more numerous leadership helped them overcome the defensive bonus of the town and they forced a number of morale checks. One unfortunate Soviet rifle platoon consistently flunked its morale checks and ended up eliminated after multiple failures resulted in two step losses. But the Red machinegun platoons in particular proved impossible to shake (both passed a couple of ‘M2’ checks).

In the 0830 and 0845 turns, the Soviets suffered a total of 3 step losses in assault and inflicted two on the Romanians (giving each side 3 step losses total). The Soviets fed some reinforcements into the assault hexes, though, and kept fighting while the Romanians maneuvered to bring support fires to bear on the two hexes of the town that weren’t under assault.

The wheels started to come off the Romanian effort, though, in the 0900 turn. The Romanians in 1004 totally whiffed on their assault result, while the Soviet defenders scored a ‘1’ against them in return. Both sides scored ‘M2’ results in assault in 1003 – and the Romanians consistently flubbed their morale checks while the Soviets passed more than their share of the critical morale rolls.

The additional step loss dropped Romanian initiative to ‘1’ in the 0915 turn and they lost the initiative roll. The Soviet captain defending the town then personally led a counter-attack into 1003, which contained (at the start of the turn) a disrupted Romanian leader, a disrupted Romanian cavalry platoon, and two demoralized full-strength cavalry platoons.

The Soviets scored a ‘1’ result and the Romanians elected to reduce one of the demoralized platoons. The Romanian leader passed his MC, but all three combat units failed. This resulted in two additional step losses from the two demoralized units (who both failed their MC by three or more) and the demoralization of the third platoon as well.

Figuring in the results from the assault in 1004, by the end of the 0915 turn the Romanians had lost 7 steps against the Russians’ 4. They had no good-order units remaining in 1003 – which was held only by a disrupted leader and one disrupted platoon after all of the recovery rolls. The area around the town was littered with reduced and demoralized Romanian cavalry units. The attack on the town, for the most part, appears to have broken.

That’s where we’ll leave the narrative for the day. The next turn, 0930, will mark the half-way point of the game (turn 15 of 30). It looks like from here on out, the Romanians will be playing for a draw – as clearing the town now seems incredibly unlikely.

However, their support weapons are all intact, as is their chain of command. And they’ve still got that off-board artillery to spread around. So there’s a chance that the Romanians may be able to pull back, dig in and hold on to a chunk of the eastern map and salvage a draw from the game.

Thursday, February 02, 2006

PanzerGrenadier: Stack 'em high

PG scenarios that don’t include lots of AFVs and transport – and even some of them that do – have some signature characteristics that players need to understand in order to be successful.

In an earlier post, I discussed the game’s pace and its morale-centric combat system. The next thing players need to consider is the game’s use of space.

Frequently, a scenario will give you a deceptively large amount of space to play around in. It’s deceptive in that once you give the victory conditions a good going-over, you’ll often figure out that most of the action is going to be concentrated in a fairly small portion of the map. All of that space may give you a number of initial options for deployment and maneuver, but once the shooting starts the area of the game map that’s really important can narrow down very quickly.

My example scenario – EFD Three: Fontana Alba – is a case in point. Two maps is a huge amount of territory for the number of units involved. But the victory conditions make it pretty clear that the four town hexes are going to be the focus of the game.

(Granted, if the Romanian player wants to play for a draw from the outset he might decide instead to occupy the woods to the south of town, but our Romanians here are playing to win and thus have to capture and hold the town. What kind of weenie starts the game looking for a draw?)

The Romanians have a few maneuver options – they have to decide on a direction to approach the town – but their goal is pretty straightforward. They have to move on the town, soften up the Soviet defense, and then assault to clear out the defenders. They have some time to accomplish this, but not tons of time. The scenario is 30 turns in length, but from the 13th turn (0900) out there is an increasing chance that a Soviet counter-attack will arrive.

In the example game, the Romanians approach the town quickly from the west and cross the river. Their cavalry draws up 3 hexes from the town. This is inside of the range of the Soviet machinegun platoons, but outside of the 2-hex range of the rifle platoons. The 3-hex range allows the Romanians to spot enemy units in the town and begin the process of trying to soften up the defense.

The ‘softening up’ involves bombardment fire from the Romanian off-board artillery – two concentrations of 12-strength fire – direct fire from their two 8-strength machinegun platoons (stacked to allow combined fire), and hail-Mary bombardment from their 5-strength 60mm mortar platoon.

The Russians respond with bombardment fire from their own mortar platoon, which is located in the woods south of town. There is an occasional head-game as the two sides trade activations and ‘passes’, but the Soviet machinegun platoons in the town generally don’t respond with direct fire. They elect instead to hold their fire and await a chance to use opportunity fire at a closer range.

Ill-timed direct fire from the Russian defenders could essentially give the Romanians a ‘free pass’ to an assault. As long as the defense remains in pretty good order (not a lot of disruption or demoralization results), the prospect of taking opportunity fire with a +3 column shift will generally persuade the Romanians that an assault is a bad idea.

Softening up a defense can take time, though. In this game, the morale boost of the Soviet captain keeps the defense steadfast until the 0800 turn, when the Romanian artillery finally has an effect on the units in hex 1004. The machinegun platoon in the hex takes a disruption result and the rifle platoon is demoralized, which at last gives the Romanians an opening to assault without having to absorb a huge amount of opportunity fire.

After their artillery strikes home, the Romanians use follow-on activations to execute a 2-hex ‘charge’ assault with some of their cavalry. Opportunity fire from 1003 inflicts a step loss on one cavalry platoon (which then disrupts) and causes the Romanian 9-morale locotenant to demoralize, but they have enough troops to commit that they can get a couple of platoons into assault.

As I mentioned in a previous post, in the PG system assault is usually a multi-turn process – and the attack on Fontana Alba isn’t going to be an exception. The demoralized Soviet rifle platoon fails to recover and flees to 1003 – but the Red captain feeds one of his reserve platoons into 1004 to bolster the machinegun platoon.

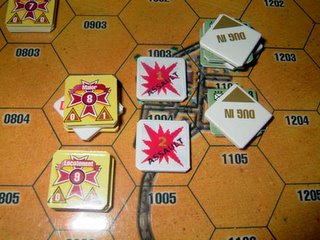
In the 0815 and 0830 turns, the Romanians work more troops into the assault, and also manage to send in an assault on 1003. The following photo shows the situation at the conclusion of the 0830 turn (which is where the situation will be left for today).


One of the things that’s almost impossible to escape in a tactical game is the use of various markers to keep track of what’s happening to the units on the map. PG is no different. MOVED and FIRED markers record which units have activated. DISRUPTED and DEMORALIZED markers show morale status. DUG IN markers indicate an additional status for the defenders. As you can see in the photo, stacks of units with markers can get pretty hefty by the end of a turn. One of the hazards of the hobby, I guess. A good pair of tweezers (or forceps) comes in pretty handy for us fumbly-fingered middle-agers who are trying to manipulate all of it on the gameboard.

Astute gamers will note one thing about my photos of the example game. I am using a mix of ‘old’ counters from the original PanzerGrenadier and ‘new’ counters from East Front Deluxe.

The Soviet infantry counters are ‘old’ counters, distinguishable by the individual numbering of units in the small type right under their unit type symbol. Except for that unit number, they are graphically the same as the ‘new’ counters. But the ‘new’ Soviet infantry in EFD is printed on the thinner counter stock that appeared first in Beyond Normandy (and has since been done away with), so I use the old counters because they’re more hefty.

The game markers are also the ‘old’ style with the plain white backgrounds and rather plain labelling. The new morale and activation markers are much more colorful – distractingly colorful, for my taste. I prefer the plain markers because they’re easier to pick out in one of those big stacks and they lend less graphic ‘clutter’ to the appearance of a game in progress.

Friday, January 27, 2006

A rather sad commentary

The past week has been very, very busy (when I haven't been flailing around with a stomach bug), but not so busy that I didn't notice this rather sad commentary on what our country has been up to lately.

An indictment of America

International Herald Tribune, JANUARY 27, 2006


When Human Rights Watch, a respected organization that has been monitoring the world's behavior since 1978, focuses its annual review on America's use of torture and inhumane treatment, every American should feel a sense of shame. And everyone who has believed in the United States as the staunchest protector of human rights in history should be worried.

Many nations - Belarus, Uzbekistan, Zimbabwe, Myanmar, Cuba, Sudan and China to name only some of the worst - routinely trample on human rights in a way that neither the United States nor any of its allies would ever countenance. But the United States wrote the book on human rights; it defined the alternative to tyranny and injustice. So when the vice president of the United States actually lobbies against a bill that bans "cruel, inhuman, and degrading treatment," Human Rights Watch is justified in delivering harsh criticism.

The report does not let anyone else off the hook. The massacre of hundreds of demonstrators in Uzbekistan, the ethnic cleansing in Darfur, the restrictions on civil society in Saudi Arabia, the atrocities in Chechnya and all the other familiar episodes of human-rights abuse are reported and condemned.

But in the introduction by the executive director of Human Rights Watch, Kenneth Roth, the United States is singled out not only because it has raised the heinous practice of torture to a "serious policy option," but also because in so doing it is sacrificing its ability to champion human rights in other countries. America is not the worst violator, Roth writes, but it is the most influential. Now, when Americans accuse Iraqi Shiites of torturing Sunni prisoners, the messenger's reputation taints the message.

The report says that 2005 made clear that abuse of detainees has become a "deliberate, central part of the Bush administration's strategy for interrogating terrorist suspects," and it accuses Britain of complicity in the practice. We have no illusion that the administration will pay any more heed to Human Rights Watch than they have to anyone else on this issue. But the report is also an indictment of the rest of the United States for failing to stop the destruction of its most cherished values.

Thursday, January 19, 2006

PanzerGrenadier: Under the hood

By way of continuing my intermittent look at PanzerGrenadier (pardon all the interruptions, but there you have it), today I’d like to wax all eloquent on a discussion of the game system in general.

One of the keys to grasping the PG game system – and thus to enjoying the game – is understanding what it is and what it isn’t. As simple as that might sound, it can actually be a subject of great confusion to many veteran wargamers. They approach what is perceived as a ‘tactical level’ game with a mix of preconceptions that can screw things up if given half a chance.

Speed, or more accurately pace, is the first preconception ‘wall’ many veteran players can hit. Most of the familiar tactical level games – Squad Leader, Advanced Squad Leader, Advanced Tobruk, Lock n Load – engage in some serious time compression. All of those systems have ‘scale’ turns that represent anywhere from 1 to 2 minutes. Scenarios generally range from 6 to 15 turns in length, with the average probably in the 8-12 turn range. Now, anyone with even a passing familiarity with ‘real’ military operations should probably recognize that events in those game proceed at an unrealistically fast pace. I’ll grant it often makes for a tense, enjoyable game. But asking an infantry company to clear 400 or 500 meters of urban terrain of enemy forces in 10 minutes is hardly a ‘realistic’ mission. World War II artillery fire missions that are called and resolved in 90 seconds exceed any forward observer’s wildest fantasies. You only need to look at a few slices of those games (many of which I enjoy) to understand that they tremendously compress the scale of time represented.

Similar time compression is absent from the PanzerGrenadier system. One of the first things you should note when flipping through one of the PG scenario books is the length of the scenarios. They frequently appear quite long – and some of them are very long indeed. The Fontana Alba scenario I’ll be discussing is 30 turns, for example. That’s 7.5 hours of ‘scale’ time, which is a fairly typical game length in the PG system.

I’ve known a few gamers who’ve had a rough go at wrapping their heads around the ‘tactical’ concept that patience is a virtue. You don’t necessarily have all day to fiddle around in PG, but you generally have the time you need to execute a fairly realistically-paced battle plan. Time enough to do some maneuver. Time enough to let your supporting arms (if you have them) do some softening-up work.

PG is not a game system that generally rewards a rushed style of play. Players who charge toward the enemy, pause to fire off maybe one or two turns of direct fire and then try to close for assault combat will, more often than not, get handed their heads.

Take a look at the Direct Fire CRT and you’ll notice that casualty rates are going to be pretty low as long as your taking shots on the ‘11’ column and anything lower. If you’re accustomed to playing tactical games where troops tend to evaporate rapidly under fire, direct fire in PG can come as a bit of a shock. Sometimes, you can stand off and blast away all day and generate hardly any casualties.

The game’s direct fire model is morale-based, not casualty-based. To my mind, for the most part it’s intended to reflect the disorganizing effects of fire on a unit’s capabilities. Direct Fire (and Bombardment, for that matter) is best used to disorder an enemy position (inflict Disrupted and Demoralized results) before you send your guys in for assault combat.

Assault combat is what takes the ground and generates the higher casualty rates. In most PG scenarios, you have to figure out how to make assault work for you if you’re going to capture contested victory locations and win the game. The Assault CRT is shorter and bloodier.

But there’s another catch that can trip up the unwary gamer with expectations carried over from different game systems. In PG, assault is not a one-turn, win or run away knife fight. Be prepared to conduct and support your assaults over a span of several turns. Frequently, assault combats don’t resolve to a conclusion in a single activation. So keep key leaders handy to support critical assaults, and keep reserve platoons handy (if you have them) to reinforce assaults and keep the pressure on when you have to pull out reduced, disrupted and demoralized platoons.

Getting your attacking units into assault combat with an enemy force is one of the grognard skills you have to develop to win at PG. As I mentioned above, running into direct fire range of the enemy, popping off a few shots and then trying to get stuck into an assault hex seldom succeeds.

If you haven’t softened up the enemy position by inflicting some disruptions and demoralizations before you go charging in, your guys can get cut to ribbons by defending fire. Assault is a ‘Fire’ action that (except in the case of cavalry) can only be initiated from an adjacent hex. Which means 1) your assault force can get hit by opportunity fire on the turn they move adjacent and 2) on the following turn, if you lose the initiative you’ll get hit by the defenders’ direct fire before you activate for the assault.

In both cases, you’re taking fire with some very nasty column shifts on the CRT. Opportunity fire is +1 column, and you’ll suffer a +2 additional shift for being adjacent to the firing unit. Even a single, lowly rifle platoon can inflict formidable punishment with a +3 column shift in its favor. It gets even worse if the position you want to assault contains multiple enemy units, or heavier assets like machinegun platoons. If it’s a multi-hex defending position with a good leader at hand, you may also be facing the coordinated opportunity fire of multiple stacks of units.

For a quick example of this, try the opening turns of Fontana Alba with the Romanians in ‘impatient mode’. They’re cavalry, right? Just charge right on in there. Pause a few hexes short of the city to spend a couple of turns dropping those ‘12’ strength artillery attacks on them. Then just sweep on into the town for some assault combat. If you can.

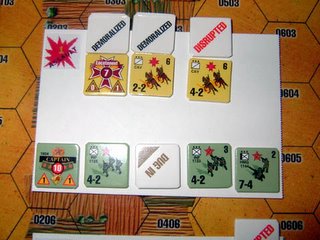
Chances are, the Romanian assault won’t do so well. Below is a photo of my Soviet defense of the town. The two western-most hexes each contain a rifle platoon (4-2) and a machinegun platoon (7-4). The northern hex is two rifle platoons. The remaining hex is the leader (in this case, a rather good Captain) and a reserve of 3 rifle platoons.


Aside from having a bit of patience, the proper placement and use of leaders is another big key to enjoying your games of PanzerGrenadier. In this case, the Captain is situated to provide useful support to every hex in the defense. His +1 morale bonus can be used by every unit in town. He could activate all of the units in town at once if he desired. And any Romanians daffy enough to attack from the south face the likelihood of the Captain acting to combine the fire of four rifle platoons and a machinegun platoon.

In this particular setup, the Soviets absolutely benefit from the luck of the draw. The randomly-selected Captain commanding the defense is one of the best leaders in the EFD countermix. The Soviets’ inferior morale (7 vs. 8 for the Romanians) will stand against them in assault combat – but with the ‘10’ morale Captain coordinating activations and providing morale support with his bonus, they stand a much better chance of inflicting some pain on the Romanians as they attempt to close for assault.

The Romanian task in this scenario is very difficult. They have to capture the town and hold it against a late-game counter-attack to win the game. In order to do that, they have to exploit a couple of razor-thin advantages.

First, they receive two ‘12’ strength off-board artillery attacks each turn. They must show a little bit of patience and use their OBA – along with their smattering of on-board heavy weapons (two machinegun platoons and a 60mm mortar platoon) – to hit the defenders with some disruptions (and maybe even demoralizations) before they assault the town.

The excellent Soviet leader hunkered down in the town makes disorganizing the defense a tough chore. All Soviet morale checks get a +1 boost, as do all recovery attempts. In fact, I’m wondering if having such a good leader in charge of things might just make the Romanians’ mission close to impossible.


Monday, January 16, 2006

It takes more than one to FUBAR

It takes more than one person to screw up an entire war. So I think we can safely spread some of the blame to Ol’ Scratch’s Left Hand Man, known affectionately to so many people as “Rummy.”

One of these days, maybe I’ll run a poll. Which Secretary of Defense was a bigger screw up – Rummy or Robert McNamara?

Here’s a vote for Rummy, I think, from The Sunday Times of London:


Blame Rummy for a war plan that went wrong
Andrew Sullivan

The great conundrum in understanding the conduct of the war in Iraq is a relatively simple one. How on earth did a noble and necessary decision to remove the Saddam Hussein regime result in such a chaotic occupation? The initial campaign to seize the country was brilliant, but almost immediately it was clear that something was awry.

The looting and mayhem in the wake of the collapse of a totalitarian state were eminently predictable. So why did the US and coalition armies simply let it happen? Why did they allow whole swathes of Iraq to descend into near-anarchy or control by Ba’athists and jihadist insurgents, make no attempt to seal the borders and dither for more than a year about the constitutional way forward?

Or to put it another way: if this project was as important as the Bush administration said it was, why did it seem unprepared and at times even indifferent to the consequences of invasion?
Well, we are beginning to get some answers — drip by drip, as former officials begin to leak or write memoirs. Two new books help a little. The first, My Year in Iraq, is by Paul Bremer, the former de facto pro-consul in Iraq in the critical early period. The second is a new biography of George W Bush, Rebel-In-Chief by Fred Barnes, published this week. Barnes, a former colleague and friend, has great White House access. If you piece together both books, you get a glimpse into how the most secretive presidency in years operated.


The picture is not pretty. Back in the spring of 2003 it had seemed obvious to most rational observers that we had too few troops to maintain order in Iraq. A mere 170,000 to control a country of 25m in a power vacuum was a joke. Towns and cities could be cleared of insurgents but never retained, because we had too few troops to stay put.

The borders were porous. We didn’t have enough troops to secure the weapons sites that the war had been designed to eradicate. General (Eric K) Shinseki famously argued before the war that we needed 500,000 troops to do the job. He was fired. Many pro-Bush military analysts, besotted with Donald Rumsfeld’s vision of a lean, mean fighting machine, told us we knew nothing about military strategy. They planned on about 40,000 troops remaining a few months after the fall of Saddam.

Well, it turns out that Bush’s right-hand man in Iraq agreed completely with the critics — or so he claims now. And Bremer is no Michael Moore. He believed in this war. And reading his book, you are struck by one thing. His appointment was rushed; he had mere days to assemble a team to govern Iraq (he largely had to find his own staff); and yet the administration had had years to prepare for this scenario.

As his plane circled into Iraq for the first time, an aide pointed out pillars of smoke everywhere. “Industrial-strength looting” was the assessment. Bremer almost immediately came to the obvious conclusion that Shinseki had been right and wanted to triple the force numbers. Triple. That is not a mild policy disagreement. It’s an indictment of the whole plan.

Bremer sent a top-level analysis by the Rand Corporation advocating far more troops to Rumsfeld. Rumsfeld never even bothered to acknowledge it. Later, when Rumsfeld was in Iraq, Bremer tried to make the case again. But Rummy was more interested in reducing troop levels because of domestic political pressure.

Back in Washington, according to Barnes’s pro-Bush book, the president found his weekly teleconferences with the generals irritatingly long. According to Barnes, “Bush liked crisp sessions without whining or complaints. Once he had to interrupt a discussion of troop rotation to say, ‘Stop the hand-wringing!’ ” This is not a management style designed to expose problems and solve them. It’s a style designed to squelch dissent.

As security deteriorated, Bremer tried again to wake Rumsfeld up: “On May 18 (2004), I gave (Condoleezza) Rice a heads-up that I intended to send Secretary Rumsfeld a very private message suggesting that the coalition needed more troops . . . That afternoon I sent my message. I noted the deterioration . . . since April had made it clear, to me at least, that we were trying to cover too many fronts with too few resources.” Again, Rumsfeld never bothered to respond.

All Bremer and (coalition commander General Ricardo) Sanchez wanted were enough troops to control Baghdad. Rummy couldn’t care less. When Bremer told him at a dinner in September 2003 that security was the No 1 priority, Rumsfeld replied, “That means moving as fast as possible on getting Iraq’s security forces stood up.” Bremer’s response: “Here we go again, I thought.”

Rumsfeld had a fixed idea that a smaller military could accomplish anything, and had absolutely no sense of responsibility for the chaos his war plan had unleashed.

His famous “stuff happens” remark in response to the early looting in Baghdad stands as the leitmotif for his entire view of the war. While Colin Powell had insisted that once you invaded Iraq you were responsible for its security, Rumsfeld thought that the Iraqis should fend for themselves.

This policy of neglect has something to do with the 30,000 innocent Iraqi civilians killed (largely by insurgents) since the US invasion. While Powell wanted to kill Moqtada al-Sadr, the Shi’ite radical, Rumsfeld balked. By May 2004, Bremer told Rice the coalition had become “the worst of all things — an ineffective occupier”.

What deeper conclusions can we draw? The post-invasion plan was all but non-existent, an act of recklessness. The reason, however, was not just incompetence; it was a deliberate decision by Rumsfeld and Bush not to commit sufficient resources for nation-building.

Rumsfeld, after all, had never been a neocon. He loathed the idea of using large numbers of American forces to reconstruct a broken society. So he deflected responsibility and ordered the crudest tactics against the insurgency: torturing large numbers of innocent Iraqis in Abu Ghraib, sending troops into combat with insufficient armour, engaging in a cat-and-mouse game with Iraqi and jihadist terrorists who knew the terrain intimately.

And Bush? There’s a very revealing statement in the Barnes book, reminding us of something that Bush said back in 1999. Bush’s main political interest “is not in the means, it is the results”. Once he had declared war, his decision was done. It was up to others to implement it. And he was bored and irritated by the follow-up details.

In Barnes’s book, Bush said during the Iraq occupation, “If Bremer’s happy, I’m happy. If Bremer’s nervous, I’m nervous.” But if Bremer is to be believed, he was deeply unhappy and Bush either dismissed his concerns or had no idea that they existed.

In an earlier statement, Bush had spoken of his faith. It is ludicrous to think, as some Europeans do, that this president invaded Iraq on instructions from the Almighty. But Bush’s kind of faith may help to explain the shambles of the occupation. He once wrote, “(My faith) frees me to enjoy life and not worry what comes next.”

His mindset is focused on grand decisions followed by results. There is no toleration for mess, whining, criticism or second- guessing. The nitty gritty — which can mean the difference between success and failure in wartime — was not his concern. He delegated the whole thing to commanders completely intimidated by Rumsfeld and institutionally trained not to challenge their bosses. You want to know why we are where we are in Iraq? We’re beginning to piece it together.

Monday, January 09, 2006

Back to the gaming table

Finally. A chance to get back to some PanzerGrenadier.

Today I’ll take a quick look at the game preliminaries – map, OOB and what’s going on in general.

Here’s the map setup for Scenario Three: Fontana Alba.


It uses two map sections, which is a fairly compact battlefield. The Romanians deploy on board 4 (the left-hand section). The Soviets set up on board 7, east of the river. Additionally, all Soviet units can begin the game in “Dug In” status, which provides a defensive bonus and gives them the advantage of “first fire” in assault combat.

The town on the eastern board (Fontana Alba) is one of the keys to the victory conditions. To win, the Romanians must occupy all town hexes on board 7. For the Russians to win, they must inflict at least 5 steps of casualties on the Romanians AND clear all territory east of the river of Romanian units.

The game length is 30 turns.

By looking at the relative forces and the victory conditions, the basic situation becomes clear. The Romanian cavalry force has to cross the river and capture the town from the Soviets. In the later stages of the game, they must then be prepared to fend off a Soviet counter-attack.

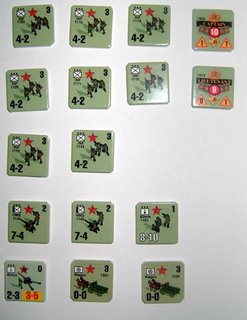
Here are the forces involved. First the Romanians:


The total force amounts to 10 platoons of cavalry, two heavy machine-gun platoons, a mortar platoon and two units of wagons. The leaders were selected randomly from the ranks designated in the OOB: a Major, a Captain and three Lieutenants. The Romanian leadership draw turns out a mixed bag, so their leadership is going to be nothing particularly great. None of the leaders carry a combat modifier. The Romanians also have the support of several off-board artillery sections (two 12-point concentrations each turn).

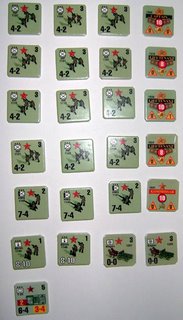
The Romanian force must capture Fontana Alba from this Soviet force:


That’s eight infantry platoons, two machinegun platoons, a mortar platoon and a section of 45mm anti-tank guns, along with a couple of wagon units. The Soviet leadership draw is better, but they have considerably fewer leaders in their initial setup.

Soviet reinforcements appear on a successful die roll by the Soviet side, with their first possible appearance on turn 13 (0900 in ‘game time’).


The counter-attacking force is formidable: 12 infantry platoons, 3 machinegun platoons, two mortar platoons and a platoon of T-26 tanks. They get four leaders for this force, with the addition of a kommissar (who can use rather heavy-handed methods to help Demoralized troops recover improved morale). When the reinforcements arrive, the Soviets also receive some support from off-board artillery (three 10-point concentrations each turn).

The Soviets also seem to benefit a bit from slightly better leadership draws. A couple of high-ranking '10' morale leaders (one with both combat and morale bonuses) will probably come in very handy at some point.

A stiff challenge for the Romanians indeed, although the Soviet victory requirement of eliminating all Romanians east of the river is also a bit of challenge.

Next entry: To battle!

Wednesday, January 04, 2006

We interrupt this program

Contrary to some rumors flying around my house, our 9-month-old Baby of Mass Destruction is not the crawling-around-the-floor incarnation of Shiva the Destroyer of Worlds.

But there was this email I received from the Missus yesterday afternoon:

“You know those wine bottles we talked about moving? You have one less to move tonight.”

At first I thought perhaps, after a tough morning before the big baby hand-off to Grandma for the day, she had decided to gulp down a bottle of Chateau Vanniere 1992.

Wrong.

The small wine rack we keep (rather, kept, as of about 9 p.m. last night) in the kitchen had suffered a casualty at the tiny but persistent hands of BMD. Only a week ago, he was quite content to sit in the family room and play with his Gymtastic Play Wall while Mom stood in the kitchen a few feet away and prepared his fresh-fruity breakfast. Something about the New Year has motivated him, though, to begin crawling after her when she puts him down and steams off in some other direction.

As we have discovered, he is now capable of High-Speed Crawling. And he has a Stealth Mode, too (which, however, he does not use when in pursuit of Sam the Cat).

Mom had no sooner stuffed the first piece of fruit into the Baby Food Musher, when she looked up to see our 19-pound marauder – having completed his hot pursuit into the kitchen area - reaching up to accost one of the lower-racked bottles.

The crash followed quickly, it appears. Broken bottle, scared baby, messy tile floor. No permanent damage – although Dad will spend the next 3 to 7 days receiving an occasional Glare of Death from Mom because, of course, it’s All My Fault.

Except for a few cheap stinkers that we shouldn’t have kept around to begin with, the surviving bottles have been placed in a secret location. We will probably convert the small rack into a climbing wall, or bib hanger or something appropriate to our new life’s mission.

And the Baby of Mass Destruction will have to move along to his next target.

Monday, January 02, 2006

Let's play! PanzerGrenadier:
Eastern Front Deluxe

I’m going to start the New Year waxing eloquent about one of the ‘other’ big sandboxes my brain likes to play in: Gaming – in particular wargaming.

Since nearly the Dawn of Time, I have been an avid wargamer. I was somewhere in the neighborhood of 14 or 15 when I picked up my first ‘real’ wargame, “Tank” in the old flat-box format from Simulation Publications, Inc. (aka: SPI). That particular archaeological artifact inhabits my ‘game closet’ still – something of a collector’s mentality being rather common in the gaming hobby.

The subject for the next few days is Avalanche Press’ recently-released game “PanzerGrenadier: East Front Deluxe” (or “EFD,” for brevity’s sake).

EFD is a considerably up-gunned remake of Avalanche’s original PanzerGrenadier game. In addition to some tweaks here and there to the Soviet and German forces, the game includes an all-new order of battle for the Romanian forces that fought in the south. This allows for numerous interesting additions to the scenario book and, indeed, EFD includes (I believe) 112 scenarios.

The enormous increase in scenario count over the original is abetted by EFD’s use of Avalanche’s new-style card stock game maps, of which there are 8 ‘geomorphic’ sections in the box. The original PG included 4 hard-mounted map boards. IMHO the new cardstock maps are a massive improvement, both in economy and in playability.

The ‘negative’ in the package is that some of the unit counters are printed on the thinner die-cut stock found in the series’ immediately previous release, Beyond Normandy. The thinner counters aren’t by any stretch unplayable, but I much prefer heavier counter stock – especially when it comes to considering how well the pieces will take a pounding over time.

I’ll admit that my assortment of PanzerGrenadier titles had been idling in the closet for some time before the release of EFD. I didn’t particularly care for either Afrika Korps or Desert Rats for some reason, although I did rather enjoy the few games of Semper Fi: Guadalcanal that I managed to play. But the two desert games sort of led my attention adrift and, what with my gaming time considerably reduced by the Baby of Mass Destruction, my wargaming focus went elsewhere.

But I am an East Front junkie, and the arrival of EFD (along with the receipt of Beyond Normandy as a Christmas gift) has re-kindled my interest.

A brief aside: My apologies, but time constraints prevent me from going into great deal detail about the hobby of wargaming or the specific mechanics of “hex-and-counter” war games. If you’re interested in them, you can gain a broader understanding of the topic by perusing websites like Boardgamegeek or Consimworld (see my links section).

For those more familiar with board wargaming, EFD portrays combat from roughly the battalion or regimental point of view. Individual playing pieces typically represent individual command elements (“leaders”), infantry or vehicle platoons or sections of heavier weapons like field artillery or anti-tank guns. Each hexagon on the map represents a scale distance of 200m from side to side, and each game turn represents 15 minutes of ‘real’ time. The 112 scenarios in the EFD scenario book cover a broad range of situations from small games using a single map and perhaps a half-dozen units per side, to very large games played on four maps sections with each player controlling several battalion-sized formations.

For the first test drive of the new game, what could be a better choice than one of the new scenarios, featuring the new Romanian order of battle? The initial scenario that I’ll be scribbling about here is Scenario Three, “Fontana Alba.” A roughly battalion-sized force of Romanian cavalry must cross a minor river, seize and hold a small town. They are faced by a smaller initial force of Russian infantry, although at some point (triggered by a dice roll) the Romanians will face a counter-attack by additional Soviet troops supported by off-board artillery.

Baby of Mass Destruction permitting, in the next entry I’ll kick off the Battle of Fontana Alba.